
When you evaluate a mixer, you need to look at several performance metrics. These include waste volume, pressure loss per unit length, loss volume in mixer elements, shear strain rate, and residence time behavior. Each performance metric helps you understand how well a mixer works and how it fits your process. By knowing what to measure, you can choose a mixer that matches your specific needs and improves your results.
Key Takeaways
Mixing quality is the top metric to check; it ensures even blending and consistent product results.
Match mixer torque, power, and speed to your material’s thickness and batch size for best performance.
Choose the right blade type and attachments to improve mixing efficiency and handle different tasks.
Pick mixer materials and motor power that fit your process to boost durability and avoid damage.
Use monitoring systems and data logging to track mixing, keep quality high, and simplify audits.
Key Performance Metrics
Mixing Quality
Mixing quality stands as one of the most important performance metrics when you choose a mixer. Good mixing quality means your materials blend evenly, which is essential for product consistency and safety. In industries like food, pharmaceuticals, and chemicals, mixing quality affects the final product’s texture, appearance, and even safety. For example, fine powders can clump together or float, making it hard to get a smooth mix. High-speed dispersers and high-shear mixers help break up these clumps and create a uniform mixture. If you use the right mixing technology for your material’s size, density, and viscosity, you will get better results and avoid waste.
You can measure mixing quality in several ways.
Method Category | Principle / Description | Application / Measurement Focus |
|---|---|---|
Velocimetric Techniques | Track particle movement with light or X-rays. | Show how particles move and mix. |
Spectroscopic Techniques | Use light to check chemical makeup. | Test if the mix is even. |
Tomographic Techniques | Use scans like X-ray CT to see inside the mix. | Find spots that are not mixed well. |
Passive Acoustic Emission | Listen for sounds from mixing. | Tell when mixing is finished. |
Torque and Power
Torque and power are key performance metrics that tell you how strong a mixer is. Torque measures the force that turns the mixer blades. Power shows how much energy the mixer uses. If you work with thick or sticky materials, you need a mixer with high torque. High-speed air mixers work well for thin liquids, while low-speed, high-torque mixers handle thick substances. The right balance of torque and power helps you achieve efficient mixing systems and keeps your product quality high. Monitoring these values also helps you avoid overloading the motor, which can damage the mixer and lower performance.
Thrust-to-Power Ratio
Thrust describes the force that moves the fluid in your mixer. The thrust-to-power ratio tells you how much thrust you get for each unit of power used. Mixer thrust provides velocity and helps move materials around the tank. A high thrust-to-power ratio means your mixer moves more fluid with less energy, which boosts efficiency. Fluid foil impellers are known for their high thrust-to-power ratio and work best in low to moderate viscosity fluids. In high-viscosity applications, you may need special impeller designs to balance thrust and flow. Remember, thrust is not the only factor; you must also consider viscosity and flow patterns for the best mixer performance.
Tip: Always match the thrust and power of your mixer to your material’s viscosity for the best results.
Mixer Capacity
Assessing Mixer Capacity
Choosing the right mixer capacity is important for every process. You need to match the mixer capacity to your batch size and recipe. Manufacturers often use the Absorption Ratio (AR) to help you decide. The AR is the weight of water divided by the weight of flour in your dough recipe. For example, if you use 25 pounds of water and 50 pounds of flour, your AR is 0.5, or 50%. This number helps you find the right mixer capacity for your needs. Mixer capacity charts from companies like Hobart show how much dough a mixer can handle based on the AR. Always check both the bowl volume and the motor power. Heavy doughs, such as pizza or bread, need more power. If you choose a mixer with too little capacity, the motor can stall. If you pick one with too much capacity, you may not get a good mix.
Tip: Use mixers with variable frequency drive (VFD) technology to keep the right speed and protect the motor when loads change.
Capacity and Application Fit
You should always consider how mixer capacity fits your application. In a commercial kitchen, you may need to make both small and large batches. Drum mixers can handle 50 to 100 gallons, while agitator mixers range from 16 to 264 gallons. Picking the right mixing capacity helps you keep your process efficient. If you use a mixer with the correct capacity, you can scale up your process without losing quality. This also helps you repeat your results every time. Advanced mixers, such as planetary centrifugal types, let you control and track mixing parameters. This makes it easier to move from small to large batches in your commercial kitchen. You will not need to spend extra time on validation or adjustments. The right mixer capacity supports both scalability and repeatability.
Speed and Control
Speed Range (RPM)
When you choose a mixer, speed range matters. Different mixers work best at different speeds. Tumble blenders run slowly, between 5 and 25 RPM. This gentle motion helps mix dense powders and fragile solids without breaking them. You get even results and protect your ingredients. In the food industry, mixers often run from 20 to 80 RPM. This speed keeps flavors and textures safe. Pharmaceutical mixers use speeds from 30 to 150 RPM. These mixers blend active ingredients evenly and keep powders intact. Construction mixers work at 50 to 150 RPM. They mix cement and sand for strong, consistent results. Chemical mixers reach speeds up to 300 RPM. These mixers create fast, even reactions but can cause dust if you go too fast.
Industry | Typical Speed Range (RPM) | Effect on Mixing Outcomes |
|---|---|---|
Tumble Blenders | 5 – 25 | Gentle mixing for dense, fragile, or abrasive powders; low shear preserves ingredient integrity. |
Food Industry | 20 – 80 | Even mixing without damaging delicate flavors or textures. |
Pharmaceutical | 30 – 150 | Uniform distribution of active ingredients while maintaining powder integrity. |
Construction | 50 – 150 | Thorough mixing for cement, sand, and aggregates to ensure strength and consistency. |
Chemical Industry | 100 – 300 | Rapid, homogeneous reactions but risks segregation or dust at excessive speeds. |
Lower speeds help with gentle mixing and larger batches. Higher speeds make mixing faster but can cause problems like dust or wear. You should match the mixer speed to your material and batch size for the best results.
Control Settings
Modern mixers give you many ways to control the mixing process. You can use knobs, faders, and touch screens. Knobs let you adjust settings by feel, which helps you make quick changes. Faders give you smooth control over volume or speed. Touch screens show you all the settings and let you change them with a tap. Hybrid mixers combine these controls, so you get both hands-on feedback and digital precision. This makes your work easier and more accurate.
Tip: Use mixers with both physical and digital controls for the best workflow and precision.
Here are some common control settings you might find:
Parametric equalizers let you adjust frequencies for better sound or mixing.
Graphic equalizers use sliders for simple control.
Filters remove unwanted parts from your mix.
Volume faders help you set the right output.
Pan controls move sound between left and right channels.
Meters show you levels to avoid distortion.
Buses combine tracks for easy management.
Phantom power supports special microphones.
Line level controls keep signals clear.
These settings help you fine-tune your mixer and get the exact results you want. You can make small changes quickly and keep your process consistent.
Blades and Attachments
Types of Blades
When you look at a mixer, you will see that the blade type makes a big difference in mixing results. Each blade shape creates a unique flow pattern and works best for certain materials. The right blade design helps you get even mixing, saves energy, and keeps your process efficient.
Here is a table showing common blade types and how they affect mixing:
Blade Type | Flow Pattern | Application & Influence on Mixing Performance |
|---|---|---|
Straight | Radial | High speed, low viscosity; breaks solids and disperses materials with strong shearing force. |
Propeller | Axial | Medium to high speed; good for suspensions and homogenization in medium to high viscosity. |
Turbine | Radial | Average speed; used for gassing and dispersion; creates high shear for low to medium viscosity. |
Anchor | Tangential | Low speed; moves thick materials along tank walls and breaks boundaries. |
Centrifugal | Axial | Medium to high speed; best for narrow vessels and bulk mixing. |
Dissolving | Radial | Average to high speed; great for suspensions and homogenization in thicker fluids. |
You will also find paddle blades, ribbon blades, and high-shear blades. Paddle blades push and stir large volumes but may not mix fine powders well. Ribbon blades create a gentle, steady flow and work well for sticky or dense materials. High-shear blades break up clumps and give you a smooth, even mix, but they wear out faster and need more care. When comparing mixer designs, always check the blade type and how it matches your mixing needs.
Tip: The right blade design can cut mixing time, improve product quality, and lower energy use.
Attachment Compatibility
Attachment compatibility gives your mixer more flexibility. You can use different accessories to handle many tasks with one machine. For example, a mixer with a No. 12 hub lets you add meat grinders, vegetable slicers, or pasta makers. This means you do not need separate machines for each job.
You can switch between mixing heavy doughs and delicate batters by changing attachments.
One mixer can help you prepare many recipes, saving space and money.
Full-service kitchens benefit from this versatility, especially when menu options grow.
You can also use attachments for non-food items, making your mixer useful in many industries.
Choosing a mixer with good attachment compatibility helps you adapt to new tasks and keeps your operation efficient.
Power and Efficiency
Motor Power
When you select a mixer, you need to match the motor power to your mixing task. High-viscosity fluids, such as pastes or paints, create strong resistance. You need a motor that can generate enough thrust to overcome this resistance. Gear motors work well for these jobs because they reduce speed and increase thrust. This helps you mix thick materials without straining the mixer. For low-viscosity fluids, you need less thrust. A smaller motor can handle these tasks easily. The right motor power keeps your mixer running smoothly and prevents damage.
You can see how motor power changes with viscosity in the table below:
Impeller Size | Speed (RPM) | Required Motor Power (HP) | Application Viscosity |
|---|---|---|---|
5-inch | 1750 | Low-viscosity fluids | |
10-inch | 1750 | 13 | High-viscosity fluids |
If you use a mixer with the wrong motor, you risk poor thrust and low performance. Always check the impeller size and the viscosity of your material. Matching these factors ensures you get the right thrust for your process. You will avoid motor strain and keep your mixer working for a long time.
Tip: For thick materials, choose a mixer with a gear motor to boost thrust and mixing power.
Energy Efficiency
Energy efficiency matters when you run a mixer for long hours. You want a mixer that uses less energy but still gives you strong thrust. ENERGY STAR certification shows that a mixer meets strict energy-saving rules set by the EPA. This helps you save money and protect the environment. ETL certification also checks for energy efficiency and safety. Mixers with these labels give you peace of mind and help your business stand out.
You should look for mixers with energy-efficient motors and smart controls. These features help you get the most thrust with the least energy. You will see lower bills and less waste. When you choose a mixer with good energy efficiency, you support both your budget and the planet.
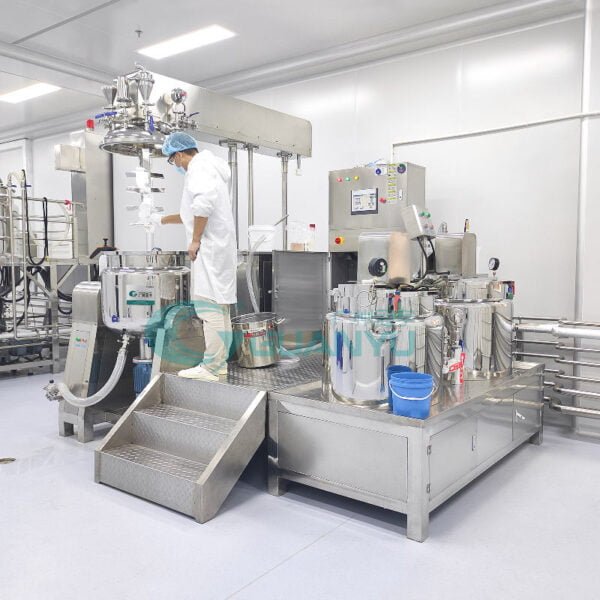
Material and Compatibility
Material Types
You need to choose the right material for your mixer to make sure it lasts and works well with your process. The material affects how the mixer handles chemicals, heat, and wear. Here are some common materials you will find:
Stainless Steel (304SS/316SS): This material resists rust and stands up to many chemicals. You often see it in food, pharmaceutical, and sanitary applications.
Alloys like Alloy 20 or CD4MCu: These alloys give extra hardness and protect against corrosion and high temperatures.
PTFE (Teflon) and PVDF: These plastics resist harsh chemicals. You might see them as coatings or linings inside a mixer.
Polypropylene (PPE): This plastic costs less and resists many chemicals, but it does not handle high heat or abrasion well.
Specialty alloys such as Hastelloy, Inconel, Titanium, and Monel offer even more protection in tough environments. Glass, especially borosilicate, gives you a clear view inside the mixer and resists many chemicals, but it does not work with every substance. The material you pick will decide how long your mixer lasts and what chemicals you can use.
Material | Key Properties & Impact on Durability | Chemical Compatibility & Applications |
|---|---|---|
Hygienic, corrosion resistant, strong | Food-grade, safe for many chemicals | |
316 Stainless Steel | Extra corrosion resistance with molybdenum | Handles acids, harsh chemicals, marine use |
Carbon Steel | Strong, affordable, but can rust | Good for strength, needs coating for chemical protection |
Tip: Always match the mixer material to your process fluids to avoid damage and keep your equipment safe.
Fluid Viscosity
Fluid viscosity tells you how thick or thin a liquid is. This property changes how you select and use a mixer. Low-viscosity fluids, like water, move easily and need less thrust to mix. High-viscosity fluids, such as syrup or paste, need more thrust to move and blend.
Static mixers work best for low-viscosity fluids. They use pressure energy to create shear and give you good mixing with little waste.
As viscosity rises, static mixers lose efficiency. You may not get a smooth mix if the fluid is too thick.
Helix mixers handle a wider range of viscosities. They give you more flexibility when your process changes.
X-Grid mixers work well for low to medium viscosity fluids, even when you have big differences in viscosity between ingredients.
Computational studies show that in rotor–stator mixers, viscosity affects both mixing and power use. If you use a mixer with a special distributor, you can improve mixing and lower energy costs, even with thick fluids. The right mixer design helps you get the best thrust and mixing quality for your application.
Note: Always check the viscosity of your process fluid before choosing a mixer. This step helps you pick the right thrust and design for your needs.
Safety and Ergonomics
Safety Features
When you choose a mixer, you must look for safety features that protect both your product and your team. Mixers used in food and pharmaceutical production must meet strict standards to prevent contamination and ensure safe operation. Here are some important safety features you should check:
Mixers must follow FDA Current Good Manufacturing Practice (CGMP) rules. These rules help keep your products sterile and free from contamination.
Clean-in-place (CIP) and steam-in-place (SIP) systems allow you to clean and sanitize the mixer without taking it apart. This reduces the risk of contamination and saves time.
The design should have smooth, welded surfaces with no crevices or bolts. This prevents bacteria and powders from getting trapped.
Gaskets and seals need to be airtight and easy to replace. This keeps powders and liquids inside the mixer.
Mixers should allow easy access for cleaning and inspection. You can spot problems early and keep your process safe.
3-A Authorization certification is required for food and beverage mixers. This certification shows the mixer meets hygienic standards.
Automated cleaning methods are better than manual cleaning. They lower the risk of human error and keep your products safe.
Tip: Always choose a mixer with features that make cleaning easy and prevent contamination. This protects both your product and your reputation.
Ease of Use
You want a mixer that feels comfortable and easy to use, especially during long shifts. Good ergonomic design helps reduce fatigue and keeps you focused. Many mixers now include features that support operator comfort and safety.
Ergonomic Feature | Benefit |
|---|---|
Reduce back and hand fatigue; let you find the best position | |
Keep buttons and screens within easy reach; minimize awkward movement | |
Excellent visibility | Help you see the mixing process clearly; reduce eye strain |
Automated loading/discharge | Lower physical effort; save time and energy |
Lightweight, balanced design | Make the mixer easier to move and handle; reduce muscle strain |
Lessen harmful vibrations; allow longer, more comfortable use |
You will also find mixers with soft grips, splash guards, and soft-start functions. These features make the mixer safer and more pleasant to use. Ergonomic mixers help you work longer without discomfort. Studies show that well-designed tools can boost productivity and lower injury rates. When you pick a mixer with strong ergonomic features, you support both your health and your work quality.
Monitoring and Traceability
Monitoring Systems
You need to keep track of your mixing process to get the best results. Modern mixers use different monitoring systems to help you watch every step. These systems give you real-time feedback and help you spot problems early. You can use sensors, cameras, and smart software to see what happens inside the mixer. This helps you make quick changes and keep your product quality high.
Here is a table showing common monitoring systems and how they help you:
Monitoring System Type | Description and Application | Contribution to Process Optimization |
|---|---|---|
Ultrasonic Sensors | Attach outside the mixing vessel to check dough consistency during mixing. | Show real-time mixing state and help you find the best mixing time. |
Power/Torque Measurement | Measure how much power the mixer uses. | Tell you when mixing is done, so you avoid overmixing and keep quality high. |
Near-Infrared Spectroscopy (NIRS) | Watch chemical changes in the mix. | Give you instant data on how well ingredients blend. |
Image Analysis | Use cameras to look at the mix surface. | Help you see if the mix is even and when to stop mixing. |
Machine Learning Models | Use data from sensors to predict when mixing is complete. | Improve accuracy and help you plan batches better, reducing waste. |
You can also use real-time process monitoring to catch issues fast. Business activity monitoring shows you key numbers and helps you make better choices. Workflow monitoring finds slow spots, and compliance monitoring keeps you on track with rules.
Tip: Use monitoring systems to spot problems early and keep your process running smoothly.
Data Logging
Data logging helps you keep records of every batch you make. You can track which ingredients you use and when you add them. This makes it easy to trace any problem back to its source. You also get a record of important settings like speed, time, and temperature.
Data logging lets you trace lots and batches, so you know exactly what went into each product.
You can see real-time data for flow rates, mixing speed, and temperature. This helps you keep quality steady.
Automatic data logging meets FDA rules for data integrity and safety.
You can show proof of safe practices during audits or inspections.
Touch-screen controls make it easy to find and review your records.
Continuous mixers with data logging help you avoid contamination and manage recalls quickly.
Note: Good data logging supports quality control and keeps you ready for any inspection or recall.
Reliability and Support
Build Quality
When you choose a mixer, you want it to last for years. Build quality plays a big role in how reliable your mixer will be. Many top industrial mixers, such as the LM-200 and CM-300, use stainless steel for their main parts. Stainless steel stands out because it resists rust, stays strong under heavy use, and cleans up easily. You can trust it to handle tough jobs without breaking down.
Key construction features that boost long-term reliability include:
Stub shaft design that mounts the agitator outside the mixing chamber, making cleaning easier and reducing contamination risks.
Quick removal and reassembly of the agitator, which means less downtime during maintenance.
Cantilever end door design, allowing you to open the mixer for cleaning or repairs without special tools or extra equipment.
Fewer hard-to-reach spots, so you spend less time cleaning and more time mixing.
These features help you keep your mixer running smoothly. You also save time and money on repairs. When you pick a mixer with strong build quality, you get better performance and fewer headaches.
Warranty and Service
A good warranty gives you peace of mind. Most leading mixer brands offer a one-year warranty from the date of shipment. For example, Ready Mixer covers defects in materials and factory work for 12 months. If something breaks in the first 90 days, you get free repair or replacement of mechanical and electrical parts. After that, you may need to pay for technician travel or shipping, but the parts are still covered.
Here is what you can expect from most mixer warranties:
Coverage for defects in materials and workmanship.
Free repair or replacement of parts within the first few months.
Some brands, like KitchenAid, offer hassle-free replacement during the first year.
Extended service plans are available if you want more protection.
Warranties usually apply only to the original owner and do not cover misuse or unauthorized repairs.
Tip: Register your mixer after purchase. This step helps you get faster service if you ever need a repair.
With strong support and a clear warranty, you can focus on your work, knowing help is there if you need it.
Assess a Mixer’s Performance
Performance Testing
You need to assess a mixer’s performance before you buy it. Testing helps you see if the mixer meets your needs for capacity, speed, and mixing quality. Manufacturers and labs use several standard tests to check how well a mixer works. These tests measure things like signal loss, leakage, and how well the mixer handles different loads. Here is a table showing some common tests:
Test Type | Purpose | Methodology Summary |
|---|---|---|
Conversion Loss | Measure signal power loss during mixing | Use fixed attenuators to ensure 50Ω impedance; measure IF power with low pass filter or spectrum analyzer |
Isolation | Measure signal leakage between ports | Use pads and terminations to maintain 50Ω; measure power at specific ports with spectrum analyzer |
VSWR (Voltage Standing Wave Ratio) | Assess impedance matching at ports | Apply signals to ports with terminations; measure reflected power using directional coupler and spectrum analyzer |
Two-tone, Third-order Intermodulation | Evaluate distortion under two-signal input | Apply two RF signals; measure intermodulation products ensuring high isolation and low harmonic content |
You can also use digital mixer selectors and application lab tests. These tools help you match the mixer to your process and vessel size. Some companies offer CFD simulations to predict how the mixer will work with your materials. These steps let you test and validate the mixer before you commit to a purchase.
Tip: Always ask for real-world or simulated tests to make sure the mixer fits your capacity and process needs.
Repeatability and Scalability
Repeatability means you get the same results every time you use the mixer. Scalability means you can move from a small lab batch to a large production run without losing quality. Both are important for industries like food, pharmaceuticals, and chemicals.
Manufacturers use lab mixers that copy full-scale mixing conditions. For example, the Silverson L5M-A and Verso Laboratory In-Line Mixer have digital displays and timers. These features help you monitor speed, power, and mixing time. You can log data and graph results in real time. This makes it easy to check if the mixer can handle different batch sizes and capacity levels.
Quadro and other companies let you test both lab and production mixers. You can see if your process works at every scale. They also provide documents and certificates to prove the mixer meets industry standards. This helps you trust that your mixer will deliver the same results, no matter the batch size.
Note: Always check for repeatability and scalability when you assess a mixer’s performance. This ensures your process stays reliable as you grow.
When you evaluate every performance metric, you make a smarter mixer investment. Recent case studies show that new mixer designs and advanced analysis methods help you achieve better results and reduce waste. You should always match mixer features to your process needs for the best investment outcome.
Mixer investment pays off when you:
Choose the right type for your materials
Use regular maintenance and monitoring
Focus on safety and training
Consideration | Operational Impact |
|---|---|
Consistent product quality | |
Automation and monitoring | Better mixer investment and efficiency |
A careful assessment leads to a stronger investment and long-term satisfaction.
FAQ
What is the most important metric when choosing a mixer?
Mixing quality is the most important metric. You want even blending for consistent results. Good mixing quality helps you avoid waste and keeps your product safe.
How do I know if a mixer can handle thick materials?
Check the mixer’s torque and motor power. High torque and strong motors work best for thick or sticky materials. You should also look at the impeller design.
Why does mixer speed matter?
Mixer speed affects how fast and how well your materials blend. Low speeds help with gentle mixing. High speeds work for quick blending but may cause wear or dust.
Can I use one mixer for different recipes?
Yes, if your mixer supports different attachments and has variable speed controls. You can switch blades or settings to match each recipe’s needs.
How does data logging help in mixing?
Data logging lets you track every batch. You can see when you added ingredients and check mixing times. This helps you keep quality high and makes audits easier.
**gl pro**
gl pro is a natural dietary supplement designed to promote balanced blood sugar levels and curb sugar cravings.
**breathe**
breathe is a plant-powered tincture crafted to promote lung performance and enhance your breathing quality.
Can you be more specific about the content of your article? After reading it, I still have some doubts. Hope you can help me.
W88xlm, I’ve seen it floating around. Decent variety, not much to complain about. Solid enough if you’re already familiar with the W88 brand. Not a bad choice, overall. w88xlm
888casinologin, nothing surprising! The login process is smooth and the site itself is pretty user-friendly. Solid option for getting into your favorite casino games quickly. Login via 888casinologin.
Thanks for sharing. I read many of your blog posts, cool, your blog is very good. https://accounts.binance.com/en/register-person?ref=JHQQKNKN
8xx07, eh? New one for me. Might be worth a peek. Anyone got any pro tips? Find out more at 8xx07.
Just found ae888l1. Looks interesting. Gonna give it a whirl this weekend. Wish me luck! See what it’s all about at ae888l1.
Banca30? Sounds like a good time! Always on the lookout for something new. I am signing up now at banca30.
I don’t think the title of your article matches the content lol. Just kidding, mainly because I had some doubts after reading the article.
888slot com apk có tính năng “nhắc lịch khuyến mãi” – không bao giờ bỏ lỡ deal hot nhờ thông báo đẩy. TONY06-16